How do I add a thermal receipt to my printer in Windows 10?
14 Apr Printer Installation Workaround (Thermal) First, navigate to the Devices and Printers section. Press the Windows Start button. If the Control Panel is in Category view, click on the View devices and printers. Once you get to the Devices and Printers screen, click on add a printer.
- Q. How do I set up an Epson printer receipt?
- Q. How do I find Epson printer IP address for receipt?
- Q. How do I put a receipt on my printer?
- Q. How do I print a receipt from Windows 10?
- Q. How do I find the IP address of my printer on a receipt?
- Q. How do I change the IP address on an Epson printer receipt?
- Q. How to add a printer to an Epson receipt?
- Q. How do I add an Epson Printer to my computer?
- Q. How do I register an Epson Printer to my account?
- Q. Where do I find Epson printer in Windows 10?
Q. How do I set up an Epson printer receipt?
Add Port & Install Printer Use the Windows search bar to find the EPSON configuration utility by typing the Epson model name such as Epson TM-M30 Utility and click the application to open. If your printer is connected correctly then the port should auto-populate with its port setting.
Q. How do I find Epson printer IP address for receipt?
Epson Receipt Printers (TM-T70, TM-T88, TM-M30 ethernet, TM-T20)
- Power the printer off.
- Press and hold the feed button.
- Power the printer on and continue to hold the feed button.
- After a few seconds a settings sheet will print, including the IP address of the printer:
Q. How do I put a receipt on my printer?
Go to: Windows Start Menu > Control Panel > Devices and Printers. Click Preferences set the Paper Size to 72 x Receipt and click OK to return to the printer properties window. Click Advanced > Printing Defaults, set the paper size to 72 x Receipt and click OK to return to the printer properties window.
Q. How do I print a receipt from Windows 10?
Make a sale and click Save Print Receipt. Depending on your General Setup & Options settings, a print dialogue box may open as well. If it does not, select File > Print from the receipt preview window. Click Print.
Q. How do I find the IP address of my printer on a receipt?
Finding the printer’s IP address
- Turn off the Star printer.
- Press and hold the feed button.
- Turn the printer back on.
- Continue to hold the feed button until the Network Configuration report prints out.
- Confirm the printer IP address. An example IP address would be: 192.168.1.73.
Q. How do I change the IP address on an Epson printer receipt?
Highlight your printer’s name, then click Configuration. Select Basic (under TCP/IP) and make sure Manual is selected. Enter the IP Address, Subnet Mask, and Default Gateway in the IP Address Setting section. Click Send.
Q. How to add a printer to an Epson receipt?
The printers list will likely be blank, as shown above, and that’s perfectly okay. Click the Add button on the right side of the window, which will take you to the Add Printer window: Now, let’s say your restaurant is rockin’ an EPSON TM-T88IV Receipt printer.
Q. How do I add an Epson Printer to my computer?
Add the Model of the Printer you have. Press the ‘Add’ button to add the new printer to Windows. Choose the Epson model of the printer installed from the pull-down menu and choose the type of interface in use (serial, parallel, USB, Ethernet, etc.) for the port type.
Q. How do I register an Epson Printer to my account?
When you see the Register a printer to Epson Connect message, click OK. If you’re creating a new account, fill out the Create an Epson Connect Account form, then click Finish. If you’re registering a new product with an existing account, select I already have an account, fill out the Add a new printer form,…
Q. Where do I find Epson printer in Windows 10?
In the Manufacturer column, select EPSON. In the Printers column, select your printer. Note: If you do not see your printer, select Windows Update. After Windows has finished updating the list of printers, select Epson in the Manufacturer column and select your printer in the Printers column. Select Next.
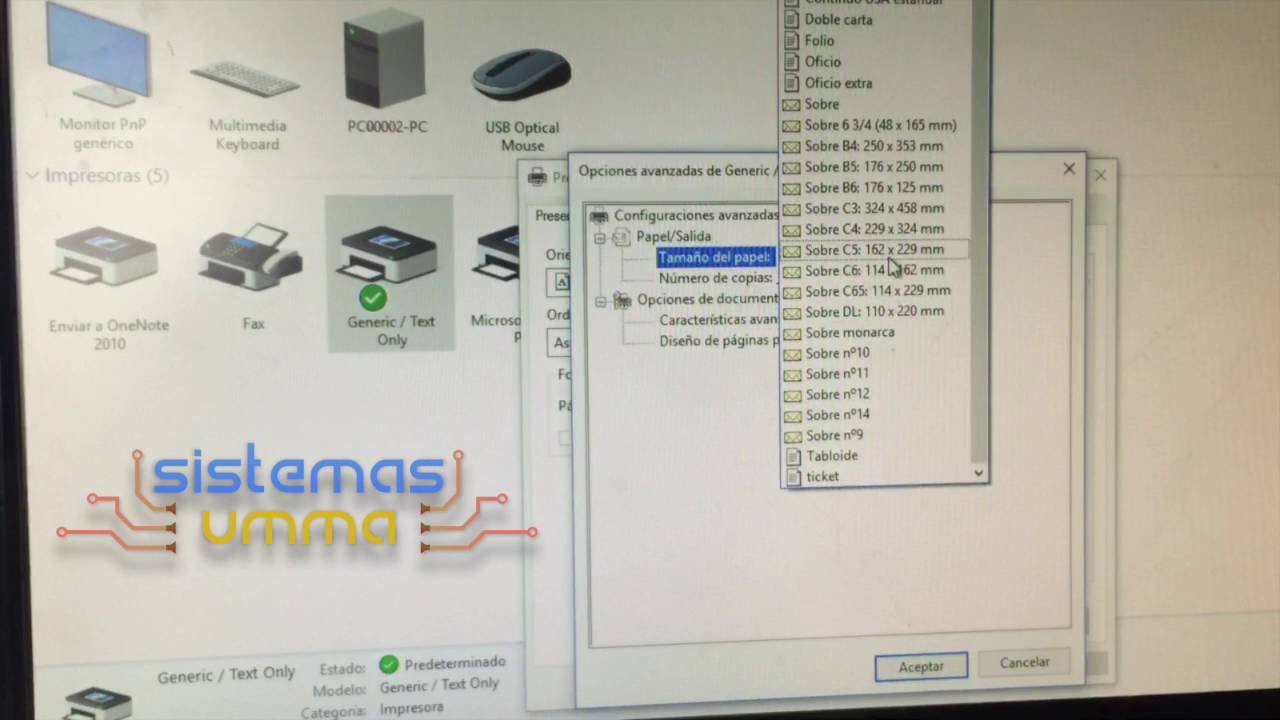
En esta ocasión les mostraremos como podemos configurar un tamaño de papel apropiado para tickets cuando hemos instalado una impresora como Impresora Genéric…
No Comments